First-time telescope buyers typically focus most of their attention on the telescope itself—that is, the optical tube—without paying any mind to the mount and tripod.
This is a mistake.
Equatorial mounts track objects smoothly across the sky by
Your ability to use and enjoy your new purchase will depend a lot on the type and quality of the mount that you choose. There is a common type of mount which new users often find particularly confusing and difficult to work with: the German equatorial mount, also known as GEM or EQ for short.
You can identify an EQ mount by the long metal shaft with counterweights protruding from the opposite side of where the telescope is attached.
These types of mounts are useful but are not intuitive; there is nothing obvious about how they are supposed to work.
When an EQ mount is set up correctly, it can track objects more smoothly and accurately than an alt-az mount and can even assist you in locating objects using celestial coordinates.

How do EQ mounts work?
The key to understanding equatorial mounts is in the setup.
Unlike simpler alt-az designs, EQ mounts have specific adjustments which need to be set before you start using the telescope.
Once an EQ mount is set up correctly, it can be pointed at celestial objects and will track the object smoothly by turning a single knob. This contrasts with alt-azimuth mounts which must be adjusted on two axes to track objects.
The single-axis motion of EQ mounts also makes them ideal for astrophotography when a clock drive is added to the system. They can make use of the celestial coordinate system for locating objects in ways that are not possible with simpler alt-az mounts.
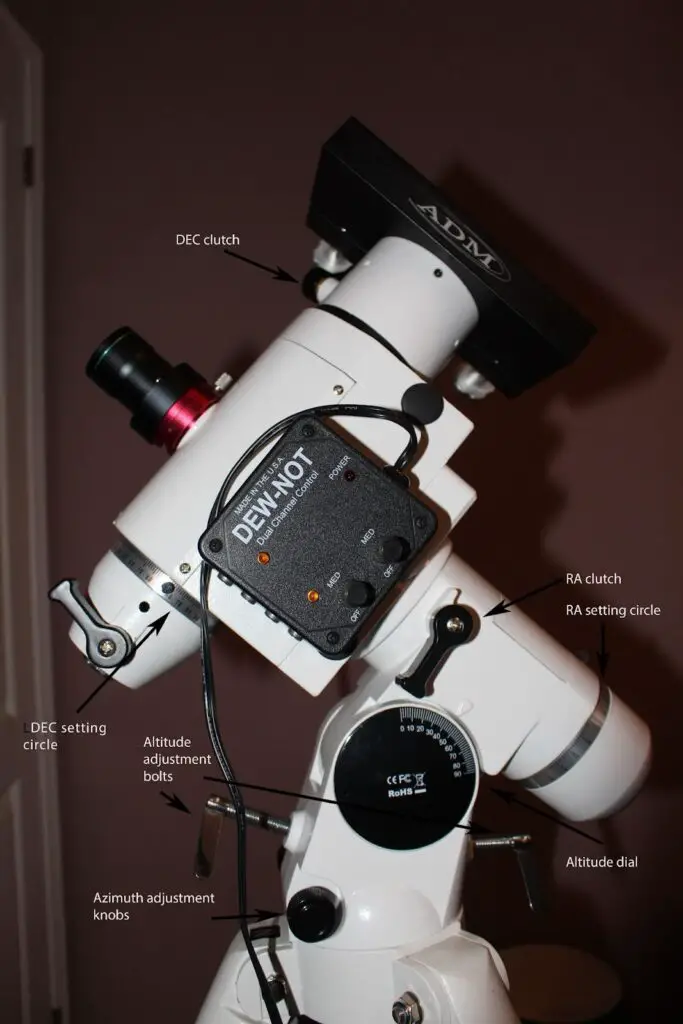
Here are 7 things you need to know about EQ mounts:
Polar Alignment
The goal of polar alignment is to have the main axis of rotation (known as right ascension) pointed toward the celestial pole, and perpendicular to the celestial equator.
Note that this is not the same thing as simply pointing your telescope at Polaris, the north star which resides less than one degree from the north celestial pole.
There are two basic steps you must perform to polar align your mount:
- Set the altitude adjustment to match your local latitude. There will be a dial on the altitude axis of your mount ranging from 0 to 90 degrees. For my location in southern Ontario, Canada, this is about 43.5 degrees.
- Position the mount so that the right ascension axis is facing north. Use an old-fashioned compass or phone app to assist you if needed. Again, this should require you to move the entire mount, not simply swiveling the optical tube. You can use the Azimuth adjustments on the mount to find-tune this step.
When you’re done these steps, your mount should be facing north and pointed at an angle equal to your latitude.
You’ll know you are close enough if you can see Polaris in your finderscope.
Accurate polar alignment is critical for long-exposure photography; the use of a device like a polar scope or more advanced techniques like drift alignment is recommended.
Counterbalance
German equatorial mounts are counterbalanced instruments.
During use, the telescope tube will usually be situated on one side of the mount, and therefore requires counterweights on the opposite side to reduce stress on the gears and allow smooth motion.
For visual use, balance doesn’t need to be perfect; just enough to prevent the mount from swinging freely when you loosen one of the clutches.
Balance is achieved in right ascension (RA) by adjusting the position of counterweights on the shaft, and adding extra weight if needed.
For the other axis, declination, balance is usually adjusted by sliding the optical tube in the tube rings. You may need to adjust balance when changing eyepieces or adding accessories like a finderscope.
You can read a bit more about balancing and see a good video on the topic in this post.
Cables and clutches
Manually-driven EQ mounts are usually supplied with flexible cables, about a foot long, with plastic knobs at the end. These cables are used to make fine adjustments to the right ascension (RA) and declination (DEC) axes.
In fact, once your mount is polar aligned and your scope is pointed to a target, you should be able to track the object smoothly just by turning the RA cable. The declination cable is used for precisely centering an object prior to tracking.
Your mount will also have plastic levers or knobs which control the clutches on each axis. When the clutches are tight, the gears are engaged and the mount should only be adjusted using the fine-tuning cables.
To make broad adjustments, disengaging the appropriate clutch will allow that axis to move freely. It is important to ensure your setup is balanced before loosening clutches; otherwise, the mount can swing or drop suddenly, causing damage or even injury.
Setting Circles
These are graduated discs located on the RA and DEC axes of equatorial mounts. The benefit of using setting circles is that they allow you to accurately set your mount’s axes one at a time.
These days, you rarely hear of people learning to use them, but if you are having trouble finding deep-sky objects with your new telescope, you might try using the setting circles. They indicate the celestial coordinates of your scope’s pointing location in the sky.
Refer to your scope’s user manual for information on how to set them for initial use.
Let’s say you see an object in your phone app that you want to view. After noting its celestial coordinates, you can unlock the DEC axis and swivel the scope until the setting circle reads the desired value. Then do the same for the RA axis. In principle, your target object should now show in a low-powered eyepiece.
The accuracy of this method will depend on your polar alignment, as well as the accuracy of the setting circles themselves.
Some users find that setting circles on low-cost instruments are less than trustworthy. Sky at Night magazine recommends first manually moving the scope to a bright star near your target to verify the accuracy of the coordinates displayed on your mount. You can read more in their article here.
Clock Drives
A clock drive is a motorized unit which rotates your mount along its right ascension axis at the same rate as Earth’s rotation, but in the opposite direction.
This effectively cancels the motion of the Earth and keeps objects centered in the field of view.
Clock drives can be added on to manual EQ mounts to provide motorized tracking.
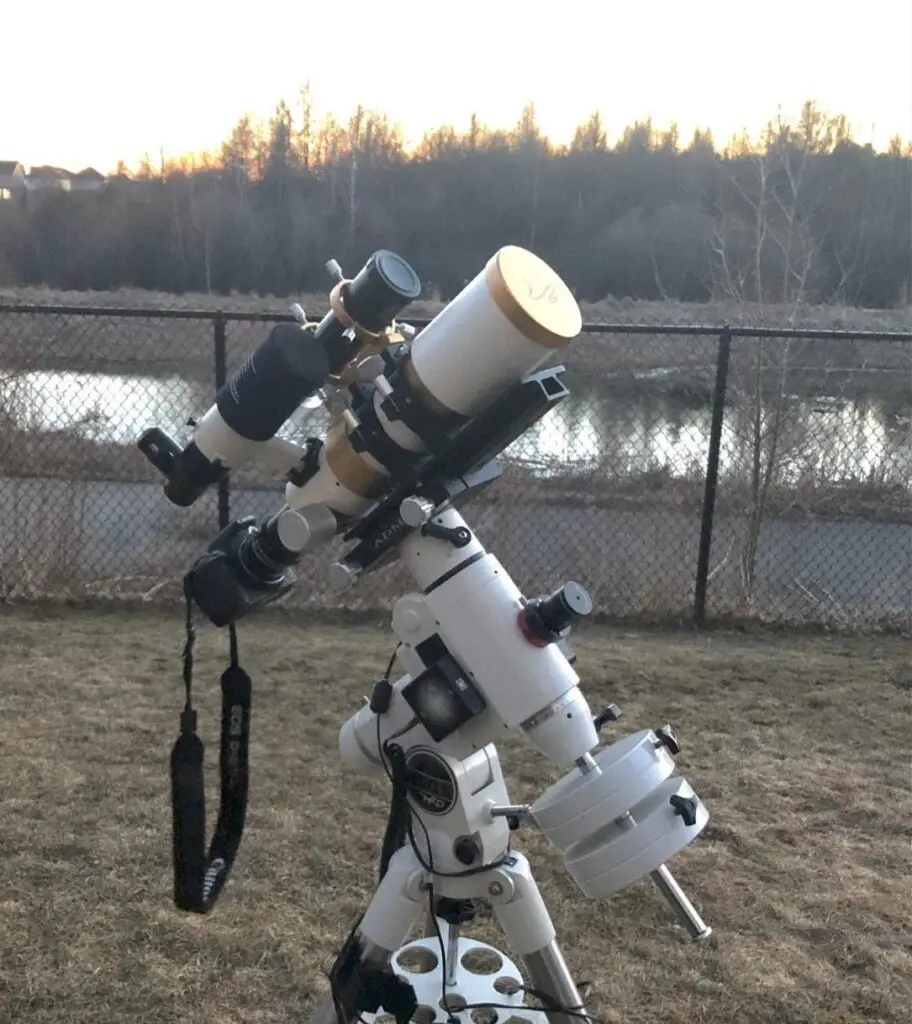
Classes of EQ Mount
Not all EQ mounts are created equal, and with good reason.
Heavy-duty mounts are expensive and cumbersome, while light-duty mounts are generally not suitable for astrophotography.
Chinese manufacturer Synta produces some of the most common and popular EQ mounts on the market, the classes of which are denoted by a numeral suffix: EQ1, EQ3, EQ5, EQ6, and so on.
These mounts typically appear under the Sky-watcher and Orion brands and many variations exist, but the main thing to look for is payload capacity. The bottom-shelf EQ1, which appears on many entry-level kits, has a capacity of less than 8lbs, whereas the vaunted EQ6-R can support payloads up to 44lbs.
In addition to the lower weight capacity, the cheaper mounts are generally flimsy, wobbly affairs which don’t make for pleasant viewing.
Starting with something at least at the EQ2 level, or better still EQ3, will provide a more stable platform for your astronomy adventures.
Go-To Mounts
Aside from beginner telescope kits, it is more common now to see computerized “GoTo” mounts as opposed to the manually-driven variety.
Under popular models such as AdvancedVX from Celestron and HEQ5 Pro from Sky-watcher, these mounts can locate and track thousands of astronomical objects at the push of a few buttons.
New users should note that polar alignment and balancing procedures still apply, though. These mounts are favoured more for astrophotography, particularly during the long exposure necessary for deep-sky objects.
Making the Choice
The type of mount you select will come down to your budget and goals. There will always be trade-offs no matter what you choose.
Equatorial mounts take more time to set up and more effort to learn, but they reward the user with easier tracking. For deep-sky photography, a computerized EQ mount is essential. For a first-time user in search of an inexpensive telescope, it might be better to avoid EQ-mounted instruments.
