There are several different ways to shoot photos of objects in space, but none is more popular than prime focus photography.
In this article we will look at what prime focus photography is, why people use it, what you need to do it, and what sort of results you can expect.
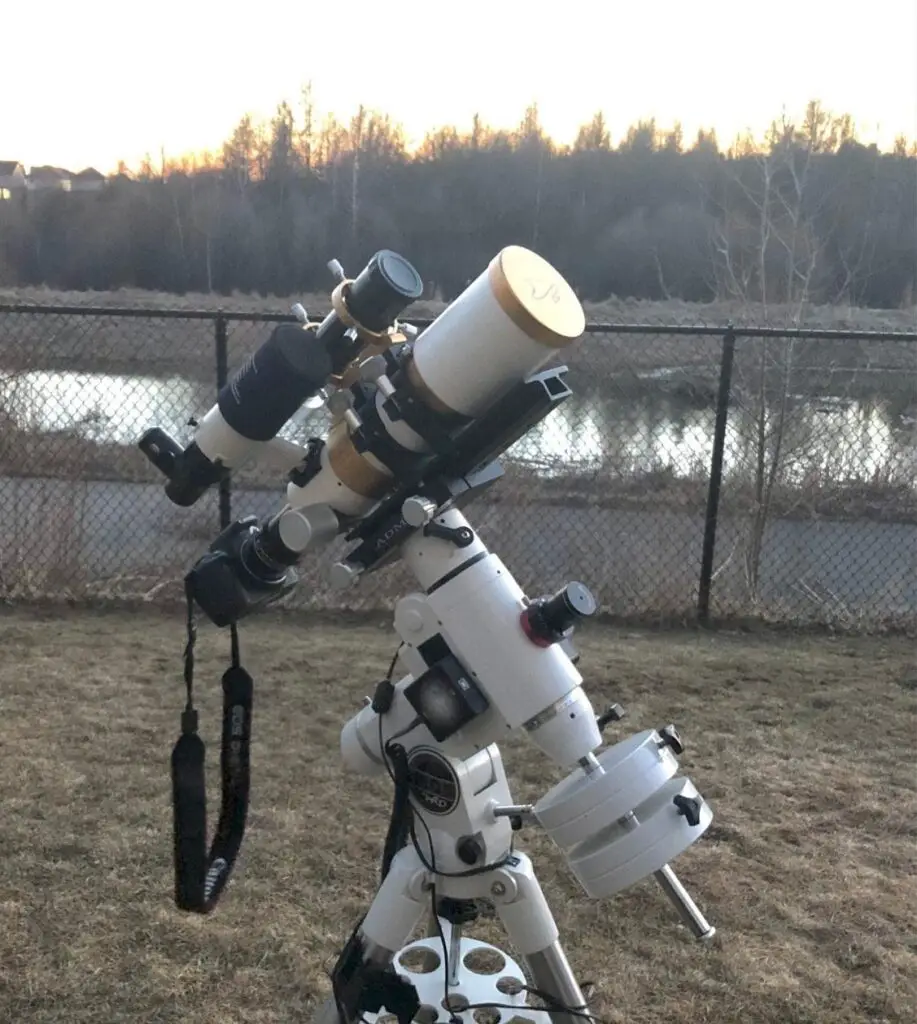
Prime focus photography involves attaching your camera body directly to a telescope, so that the telescope effectively becomes the camera lens. In this configuration, the camera is said to be at prime focus, meaning that the camera sensor is positioned at the point where the image produced by the telescope comes into focus.
The magnification (technically, the image scale, pixel scale, or plate scale) of this arrangement is determined by your telescope’s focal length and the size of the pixels on your camera’s sensor, as well as any corrective optics like barlow lenses or focal reducers you might be using.
One of the things I found confusing about astrophotography, coming from the visual side of the hobby, was trying to figure out magnification.
In prime-focus photography, the image scale refers to the size of the image on your camera sensor. Unlike visual astronomy, changing the image scale isn’t simply a matter of plopping in a different eyepiece. A given telescope and camera combination will yield a certain image scale and field of view.
You can increase or decrease this scale by adding a barlow lens or focal reducer, but beyond that, what you see is what you get.
Therefore, it’s important to select your equipment very deliberately for the type of objects you want to shoot.
Benefits of Prime Focus Photography
Almost everyone who owns a telescope will want to take pictures through it sooner or later. Like most telescope owners, I started out doing afocal photography, where you simply hold your camera lens over the telescope eyepiece and try to get a good shot.
I can tell you that this gets old fast.
Not only do you have to struggle with lining up your camera lens with the eyepiece exit pupil while holding your hand steady, but you are also limited to very short exposures of bright objects like the moon or Jupiter. While it is possible to get some pretty impressive shots this way, when you start looking around online it quickly becomes apparent that the best photos are shot with the prime focus method.


These images of the moon were shot with the same telescope. The left picture was taken at prime focus with my DSLR. The right picture was shot with my iPhone through a 9mm eyepiece. This is an example where afocal photography can yield better results. Images: Mike Ducak
Prime focus is the method of choice for long exposures, which makes it ideal for deep-sky imaging.
Prime focus photos will naturally be brighter than photos through an eyepiece, and the direct connection between telescope and camera provides better stability than a smartphone holder or eyepiece projection adapter.
Shooting at your telescope’s native focal length, rather than at some higher magnification, means easier aiming, focusing, and tracking of the telescope. You can achieve good results with a regular DSLR, and for those who desire a higher level of performance there is a whole range of dedicated astro-cameras to suit every purpose.
What You Need for Prime Focus Photography
The two main requirements are a telescope and a camera from which the lens can be detached.
Cell phones, point-and-shoot cameras, and bridge cameras are therefore not compatible with this method.
If you already have a DSLR and a telescope you can try connecting them, but you will need a T-ring which fits onto your camera body just like a camera lens, and a t-adapter which will fit in your focuser.
Some telescopes have threading on the focuser to allow a direct connection with the t-ring. Make sure that all the parts you buy are compatible and have matching threads, as there are many different options on the market.
Not all telescopes are suitable for this type of photography.
Newtonian reflectors, for instance, often lack sufficient back focus and will only work with a barlow lens in place, which pushes the focal plane further out.
Entry-level telescopes also generally have low-quality focusers which can make achieving sharp focus a challenge.
While there is no harm in trying this with the equipment you have, the results might be less than satisfactory.


Most experienced photographers recommend starting with a short focal length, which will be less critical when it comes to things like tracking and vibrations.
A short-focus refractor is a low-maintenance, portable instrument for taking wide-field pictures. Conversely, a long-focus instrument like a Maksutov is better suited for compact targets like planets.
A good compromise might be something like an SCT with a focal reducer, but this comes at a significant cost.


A much bigger consideration than either the telescope or the camera is the telescope mount and tripod. It is really the poor-quality mounts which make astrophotography with a cheap telescope difficult if not impossible.
Even a solid mount will be limited to exposures of a few seconds if it doesn’t have tracking capability. At the same time, a tracking mount which is very shaky will face similar limitations. For these reasons, you are not likely to find a worthwhile telescope/mount combination under $500 if deep-sky photography is your goal.

For deep-sky imaging, a solid equatorial mount with motorized tracking is highly recommended.
I used a Sky-Watcher HEQ5 Pro, which is generally considered the entry to the really good ones.
There are some less expensive options to consider, such as the EQ35-M and the Celestron Advanced VX. For planetary photography, you can get away with an alt-az mount but because you will need to shoot at a long focal length you still want something that will hold your scope steady while tracking. People seem to have good results with the Nextstar SE series from Celestron.
As for the camera, it is common to start with the DSLR you already own. I bought a Canon T5i for nature photography and only made the switch to deep-sky imaging years later. For a DSLR, you will want an intervalometer to trigger the shutter release. This can also be accomplished with computer software.
If lunar or planetary shots are your goal, there are inexpensive planetary cameras on the market.
Even the lowly webcam has a place here, and the video it records can be stacked and processed to create remarkable images.
Post Processing Images
The results you get from prime focus photography are determined as much, or perhaps even more, by image capturing and post-processing techniques as by the equipment you use.
The best astro-images are the result of multiple exposures of the same object, combined with calibration frames using stacking software and then imported into a photo editing program where various adjustments are made.
A single image often takes several hours, or even several nights, to complete, so don’t expect to snap photos of heavenly wonders with a single shot.
If you are shooting from an urban location, light pollution will make your individual shots look terrible. Even from a dark site, a single exposure usually looks dim and unimpressive.
Also, low-light photos tend to look grainy due to thermal noise.
Stacking multiple exposures and processing the result is the solution to all these issues.


The learning curve here can be quite steep, and anyone who has done this a while will tell you that it gets expensive fast: autoguiders, filters, electronic focusers, dew heaters, the list goes on. The good news is that all the software you need, from camera control to image stacking to post-processing, can be downloaded for free. There has hardly ever been a better time to get into this hobby.


An afocal shot of the Ring Nebula compared to a stacked prime focus image.


